If you’re looking for a modified version of Chaturanga Dandasana, want to work yourself up to the Low Plank, or possibly want to learn how to complete a Surya Namaskar flow, the 8-Point Pose is a fantastic starting point! It’s perfect for beginners or those who want a less strenuous version of this fantastic core exercise.
What Is The 8-Point Pose?
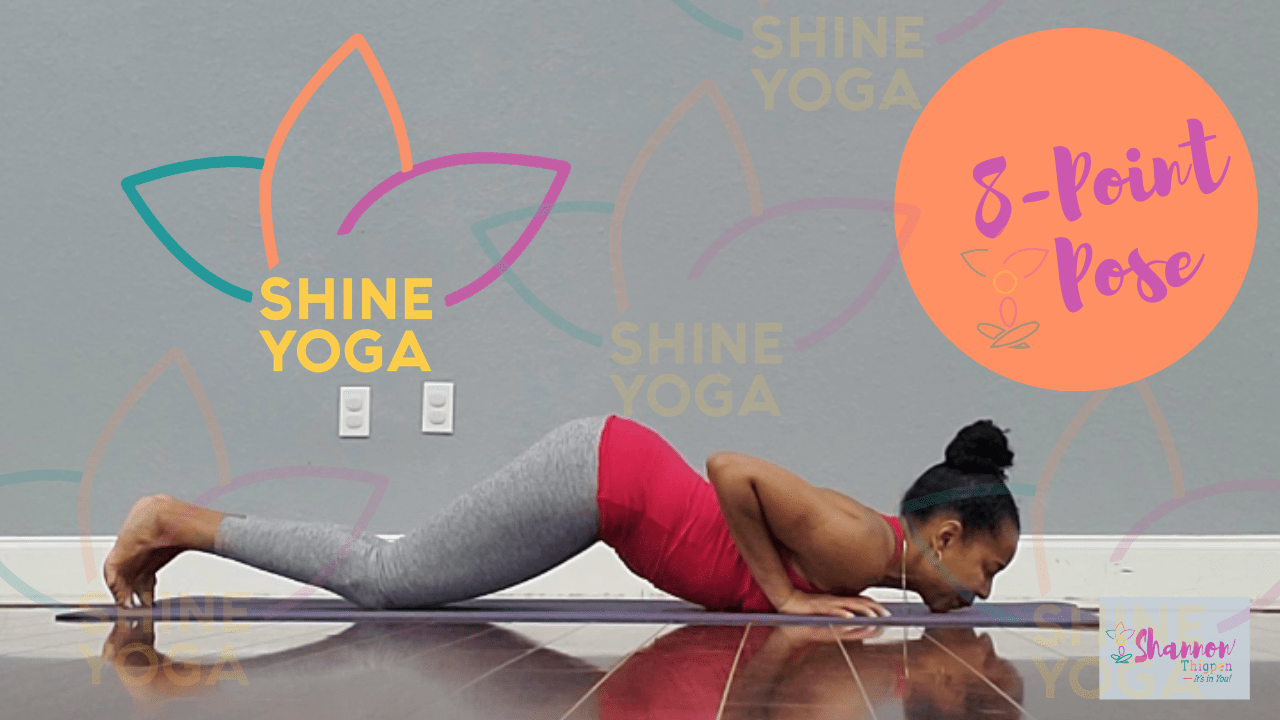
The 8-Point yoga pose, called Ashtangasana in Sanskrit, is a variation of Hover (Chaturanga). It is called 8-Point Pose or 8-Limb Pose because your 1-chin, 2-chest, 3,4-knees, 5,6-feet, and 7,8-hands are touching the mat.
Benefits
This pose will help you to build the strength necessary for Chaturanga. You strengthen your core, arms, wrist, chest, and back, glutes. It stretches the soles of your feet and toes. Flexibility is increased in the spine and will help to increase backbends.
Step 1 – Knees And Hands On The Mat
To begin, position yourself prone (facing the mat) with your hands and knees on the mat. Your hands are under your shoulders and your knees are slightly behind your hips. The fingers are spread and active pressing the pads of your fingers into the mat. Your head should remain in front of your hands. Slowly lower your chest with your elbows coming close to your side. Keep your hips raised and your core engaged.
Step 2 – Lower Your Torso
Next, lower yourself toward the mat by bending your elbows, but be sure to keep your elbows tucked in! Think tricep push-up rather than a wide push-up! It’s OK if you can only manage to dip slightly, but once you have the hang of it you want to stay under control and bring both your chest and chin to the mat. Keep your hips up as you make contact with the ground. This will help prepare you for the full Chaturanga, which will start with the beginning phase like that of a tricep push-up, just without the support of your knees on the floor!
Step 3 – Slither Into Cobra!
Here comes the transition from upper-body work to core work! Bring your hips down to the mat and push your feet back so you are momentarily prone on the floor. From here, engage your core and lift your torso by extending your arms and bringing you into Cobra (because you now look like a cobra with its head in the air and still in contact with the earth from the waist and down)!
If that’s too much all at once, you can try the first three steps with your forearms and elbows underneath you – like in a modified plank – and propel yourself down before pushing up into a modified Cobra Pose.
Step 4 – Push Back Into Child’s Pose
Now comes the part that should really feel good! With your hands underneath you, send your hips straight back and into the air while keeping your knees on the ground. Your hands should be extended in front of you with your fingers flexed on the mat like you’re playing the piano. Your wrists, elbows, and arms are all in the air, creating a line that extends from your hips to your wrists. Bend at the wrist to flex and stretch your forearms. Hold here for a deep stretch on your back and spine!
Make It A Little Harder (For Yoga Pros!)
If you want *more* of a challenge, instead of pushing into Child’s Pose, try pushing into Downward Dog, but only if you’re really feeling comfortable and you’re somewhat of a yoga pro! Then, propel forward into Plank and keep those strong arms! Now repeat the process and work through the 8-Point Pose again! Bring your knees to the mat and lower your torso and chin to the ground. Peel through to Cobra and push back to your Down Dog.
You did it! You’ve completed Ashtangasana or the 8-Point Pose! Keep working at it and you should be able to build up to Chaturanga. Alternatively, use this workflow for a quick workout to engage your upper body, core, spine, and hips! Check out the video below to see it all together! If you’d like more yoga poses and their variations, check out my YouTube page!

Leave A Comment